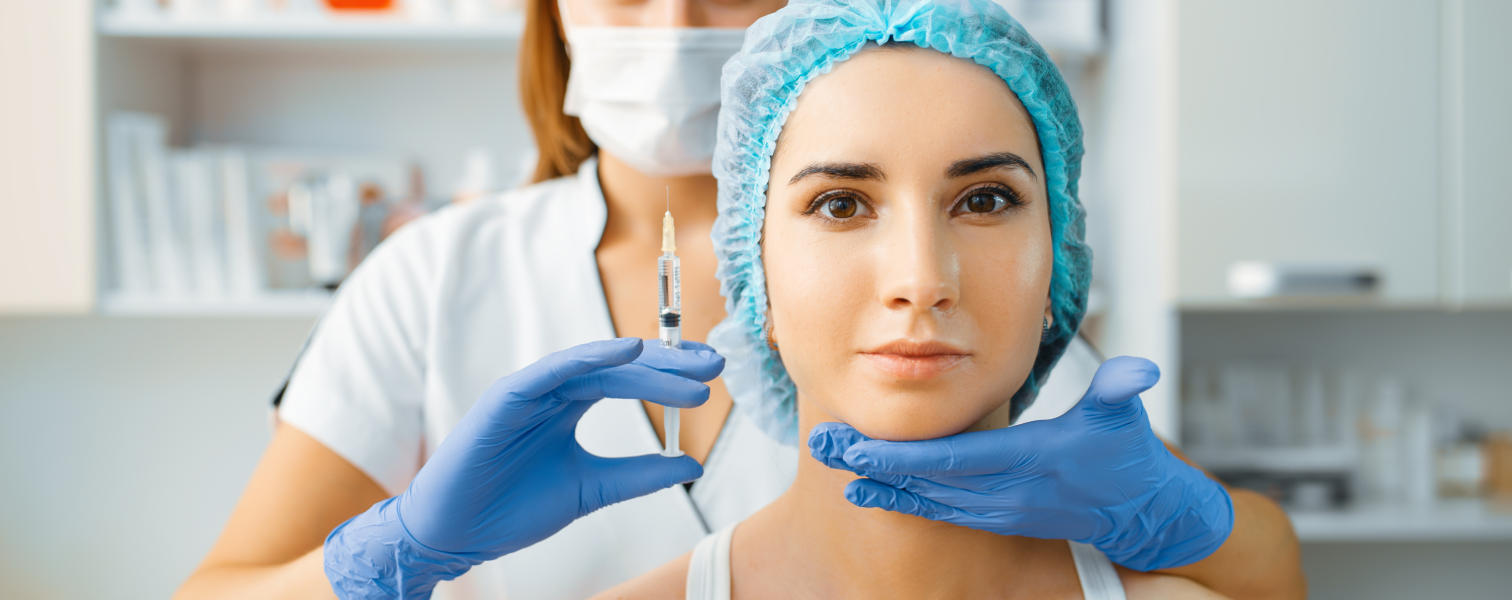
A Step-by-Step Guide to Cheek Augmentation in Turkey
Nereden Başlayacağını
Bilmiyor musun?
Doğru uzmanı en uygun fiyat garantisiyle bulun

Your Heal Road consultant can help you compare clinics and plan your cheek augmentation journey.
Get guidance on surgeon selection, treatment options, and what to expect before you book.
In-Depth Research and Choosing the Right Clinic for Cheek Augmentation
Successful cheek augmentation in Turkey starts with choosing the right clinic and specialist. Turkey offers a wide range of options especially in Istanbul, Ankara, Izmir, and Antalya but results can vary depending on the surgeon’s experience, the technique used (implant vs. fat transfer vs. fillers), and the clinic’s safety standards. Use the checklist below to compare providers and feel confident about your decision.
1) Verify surgeon credentials and facial specialization
Prioritize a board-certified plastic surgeon (or a facial plastic specialist) with extensive experience in midface and cheek procedures. Ask how many cheek augmentations they perform per month/year and which techniques they recommend for your facial structure.
2) Confirm the clinic’s accreditation and safety standards
Look for recognized quality and safety frameworks (e.g., JCI, ISO, or strong national healthcare oversight). Ensure the procedure is performed in a properly licensed surgical facility with an anesthesiology team and clear emergency protocols.
3) Review real before-and-after results (and request similar cases)
Ask to see multiple before-and-after photos with consistent lighting and angles. Request examples that match your goals (subtle definition vs. stronger projection) and your starting anatomy (flat midface, asymmetry, volume loss, etc.).
4) Ask about the recommended technique and why
- Cheek implants: Best for structural projection; ask about implant material, placement plane, fixation method, and revision policy.
- Fat transfer: Best for soft, natural volume; ask about expected retention rate, number of sessions, and donor-site details.
- Fillers: Best for non-surgical enhancement; ask which product, injector qualifications, and how complications are handled.
A reputable clinic explains the pros/cons for your face rather than pushing a single option for everyone.
5) Ensure a thorough consultation and planning process
High-quality clinics take a full medical history, review medications/supplements, discuss smoking status, and set realistic expectations. For surgical augmentation, ask whether imaging or facial measurements are used to plan symmetry and projection.
6) Evaluate transparency in pricing and what’s included
Request an itemized quote covering surgeon fees, anesthesia, operating room costs, implants (if applicable), medications, compression/aftercare supplies, and follow-up visits. If offered, confirm what an “all-inclusive package” includes (hotel, transfers, interpreter, aftercare) and what it excludes.
7) Check aftercare, follow-up, and revision support
Ask how many post-op checkups are included, who you contact after hours, and how complications are handled once you return home. For implants and fat transfer, clarify the clinic’s policy on touch-ups or revisions and the associated costs.
8) Look for clear communication (especially for international patients)
Choose a clinic that provides written pre- and post-op instructions, informed consent documents in a language you understand, and a dedicated coordinator to manage scheduling and recovery logistics.
In-Depth Research and Choosing the Right Clinic for Cheek Augmentation
Successful cheek augmentation in Turkey starts with choosing the right clinic and specialist. Turkey offers a wide range of options especially in Istanbul, Ankara, Izmir, and Antalya but results can vary depending on the surgeon’s experience, the technique used (implant vs. fat transfer vs. fillers), and the clinic’s safety standards. Use the checklist below to compare providers and feel confident about your decision.
Your Heal Road consultant can help you compare clinics and plan your cheek augmentation journey.
Get guidance on surgeon selection, treatment options, and what to expect before you book.
1) Verify surgeon credentials and facial specialization
Prioritize a board-certified plastic surgeon (or a facial plastic specialist) with extensive experience in midface and cheek procedures. Ask how many cheek augmentations they perform per month/year and which techniques they recommend for your facial structure.
2) Confirm the clinic’s accreditation and safety standards
Look for recognized quality and safety frameworks (e.g., JCI, ISO, or strong national healthcare oversight). Ensure the procedure is performed in a properly licensed surgical facility with an anesthesiology team and clear emergency protocols.
3) Review real before-and-after results (and request similar cases)
Ask to see multiple before-and-after photos with consistent lighting and angles. Request examples that match your goals (subtle definition vs. stronger projection) and your starting anatomy (flat midface, asymmetry, volume loss, etc.).
4) Ask about the recommended technique and why
- Cheek implants: Best for structural projection; ask about implant material, placement plane, fixation method, and revision policy.
- Fat transfer: Best for soft, natural volume; ask about expected retention rate, number of sessions, and donor-site details.
- Fillers: Best for non-surgical enhancement; ask which product, injector qualifications, and how complications are handled.
A reputable clinic explains the pros/cons for your face rather than pushing a single option for everyone.
5) Ensure a thorough consultation and planning process
High-quality clinics take a full medical history, review medications/supplements, discuss smoking status, and set realistic expectations. For surgical augmentation, ask whether imaging or facial measurements are used to plan symmetry and projection.
6) Evaluate transparency in pricing and what’s included
Request an itemized quote covering surgeon fees, anesthesia, operating room costs, implants (if applicable), medications, compression/aftercare supplies, and follow-up visits. If offered, confirm what an “all-inclusive package” includes (hotel, transfers, interpreter, aftercare) and what it excludes.
7) Check aftercare, follow-up, and revision support
Ask how many post-op checkups are included, who you contact after hours, and how complications are handled once you return home. For implants and fat transfer, clarify the clinic’s policy on touch-ups or revisions and the associated costs.
8) Look for clear communication (especially for international patients)
Choose a clinic that provides written pre- and post-op instructions, informed consent documents in a language you understand, and a dedicated coordinator to manage scheduling and recovery logistics.

Initial Online Consultation and Candidacy Assessment
After you’ve shortlisted a few reputable plastic surgery clinics in Turkey, the next step is to book an initial online consultation. Many clinics offer this remotely (often free or low-cost), allowing you to speak directly with your surgeon or patient coordinator, share photos, and discuss your goals before you travel. This consultation helps confirm whether cheek augmentation is appropriate for your facial structure, what technique is best (filler, fat transfer, or implants), and what results you can realistically expect.
Share Your Goals and Reference Photos
You’ll discuss what you want to change more projection, better definition, improved symmetry, or midface volume restoration. Bringing reference photos (and describing what you like about them) helps your surgeon understand your aesthetic preferences and recommend a plan that suits your natural features.
Medical History and Safety Screening
Your team will review your medical history, including medications, allergies, smoking/vaping, previous facial procedures, bleeding/clotting issues, and any chronic conditions. This is essential for choosing the safest option and planning anesthesia (local vs. sedation vs. general, depending on the method).
Photo/Video Assessment and Technique Selection
You may be asked to send clear, well-lit photos (front, both profiles, and 45-degree angles) or join a video call for a facial assessment. Based on your anatomy and goals, your surgeon may recommend:
- Dermal fillers for subtle-to-moderate enhancement with minimal downtime
- Fat transfer for natural volume using your own fat (with some variability in retention)
- Cheek implants for more defined, long-lasting structural projection
Treatment Plan, Timeline, and Expectations
Before you commit, you should receive a clear outline of the proposed approach, expected results, recovery time, and key risks (such as swelling, asymmetry, infection, implant movement, or vascular complications with fillers). This is also the time to confirm how many days you should stay in Turkey, how many follow-up checks are included, and what aftercare support is available once you return home.
| Treatment Option | Typical Timeline |
|---|---|
| Cheek Filler (Hyaluronic Acid) | Same day (30–45 min) |
| Cheek Filler + Review/Top-up | Day 7–14 follow-up |
| Cheek Implant Surgery | 1–2 hours (outpatient) |
| Implant Check-ups & Recovery Window | 7–10 days in Turkey |
Use our Calculation Module to Find Out
The Cost of Cheek Augmentation
Calculate My Cost
Personalized Treatment Plan: Implant vs. Filler and Scheduling
After your consultation and facial assessment, your surgeon will create a personalized cheek augmentation plan based on your anatomy, desired projection, and how long you want results to last. In Turkey, clinics commonly offer two main options cheek implants or dermal fillers and your plan will also include a clear timeline for treatment and recovery.
Cheek implants are typically recommended when you want a more defined, structural change (especially for flatter midfaces) and a long-term solution. Your plan may include implant type/size, incision approach (often inside the mouth), anesthesia details, and whether any additional procedures (e.g., fat grafting or facelift) could improve balance.
Cheek fillers are usually recommended when you prefer a non-surgical approach, want a subtle-to-moderate lift, or would like to “test-drive” a new cheek shape before committing to surgery. Your plan will specify the filler type, estimated syringe amount, injection points, and follow-up for refinement.
- Implant planning typically includes: pre-op photos, facial measurements, implant selection, medical clearance, and a recovery schedule (swelling/bruising expectations and time off work).
- Filler planning typically includes: product choice, conservative first-session dosing, aftercare instructions, and a review appointment if a touch-up is needed.
- Travel and scheduling: many Turkish clinics coordinate appointment timing around your flights and may offer airport transfers, hotel options, and interpreter support for international patients.
Before you confirm dates, ask for your treatment plan and package details in writing including what is included (consultation, imaging, anesthesia, medications, follow-ups), how many clinic visits are required, and what to do if you need adjustments after returning home.
| Treatment Option | Typical Timeline |
|---|---|
| Cheek Filler (Hyaluronic Acid) | Same day (30–45 min) |
| Cheek Filler + Review/Top-up | Day 7–14 follow-up |
| Cheek Implant Surgery | 1–2 hours (outpatient) |
| Implant Check-ups & Recovery Window | 7–10 days in Turkey |
Use our Calculation Module to Find Out
The Cost of Cheek Augmentation
Calculate My Cost

& Medical Info
Pre-Procedure Check
Traveling to Turkey and Pre-Procedure Preparations
Once your cheek augmentation plan is confirmed, your clinic team will help coordinate your travel to Turkey and ensure you arrive prepared for treatment. Many clinics arrange airport pick-up and transportation to your hotel or clinic accommodation, so you can settle in comfortably and focus on your procedure.
Before any treatment begins, you will attend a pre-procedure consultation to review your goals, confirm the safest approach (filler vs. fat transfer vs. cheek implants), and finalize the treatment plan. This appointment is also the best time to ask questions about expected results, downtime, and aftercare.
What to Bring and Share With Your Surgeon
- A list of your current medications and supplements (including blood thinners, aspirin/NSAIDs, vitamin E, fish oil, and herbal products).
- Relevant medical history (prior facial surgery, dental issues, allergies, bleeding/clotting disorders).
- Reference photos showing your preferred cheek shape and projection (helpful for aligning expectations).
Clinical Assessment and Planning
Your provider will assess facial proportions, skin quality, and midface volume loss, then map the safest injection or implant placement zones. If cheek implants are planned, additional evaluation may be performed to confirm suitability and reduce risks such as asymmetry or implant malposition.
Pre-Procedure Guidelines (Typical)
- Alcohol and smoking: avoid for at least 24–48 hours before fillers; for surgical options (fat transfer/implants), your surgeon may advise stopping smoking earlier to support healing.
- Medication adjustments: only stop or change prescribed medicines if your surgeon and prescribing doctor approve.
- Skin preparation: arrive with clean skin and avoid heavy makeup on the day of treatment.
- Travel timing: plan a buffer day before the procedure when possible, and allow time after treatment for follow-up and monitoring before flying home.
Day-of Logistics
You’ll be given clear instructions on arrival time, consent forms, and what to expect during treatment. If sedation or surgery is involved, you may need fasting and a companion for the first night your clinic will confirm these details in advance.
Traveling to Turkey and Pre-Procedure Preparations
Once your cheek augmentation plan is confirmed, your clinic team will help coordinate your travel to Turkey and ensure you arrive prepared for treatment. Many clinics arrange airport pick-up and transportation to your hotel or clinic accommodation, so you can settle in comfortably and focus on your procedure.
Before any treatment begins, you will attend a pre-procedure consultation to review your goals, confirm the safest approach (filler vs. fat transfer vs. cheek implants), and finalize the treatment plan. This appointment is also the best time to ask questions about expected results, downtime, and aftercare.
& Medical Info
Pre-Procedure Check
What to Bring and Share With Your Surgeon
- A list of your current medications and supplements (including blood thinners, aspirin/NSAIDs, vitamin E, fish oil, and herbal products).
- Relevant medical history (prior facial surgery, dental issues, allergies, bleeding/clotting disorders).
- Reference photos showing your preferred cheek shape and projection (helpful for aligning expectations).
Clinical Assessment and Planning
Your provider will assess facial proportions, skin quality, and midface volume loss, then map the safest injection or implant placement zones. If cheek implants are planned, additional evaluation may be performed to confirm suitability and reduce risks such as asymmetry or implant malposition.
Pre-Procedure Guidelines (Typical)
- Alcohol and smoking: avoid for at least 24–48 hours before fillers; for surgical options (fat transfer/implants), your surgeon may advise stopping smoking earlier to support healing.
- Medication adjustments: only stop or change prescribed medicines if your surgeon and prescribing doctor approve.
- Skin preparation: arrive with clean skin and avoid heavy makeup on the day of treatment.
- Travel timing: plan a buffer day before the procedure when possible, and allow time after treatment for follow-up and monitoring before flying home.
Day-of Logistics
You’ll be given clear instructions on arrival time, consent forms, and what to expect during treatment. If sedation or surgery is involved, you may need fasting and a companion for the first night your clinic will confirm these details in advance.
Procedure Day: What to Expect During Cheek Augmentation
08:30
Check-in &Final Assessment
09:30
Anesthesia &Marking
10:00-12:00
CheekAugmentation
13:30
Recovery &Discharge
You’ll arrive at the clinic, complete paperwork, review your goals, and confirm the plan with final photos and facial markings.
Your surgeon marks the cheek area and the anesthesia team prepares you—typically local anesthesia with sedation, or general anesthesia depending on technique.
The procedure is performed via small incisions (often inside the mouth) for cheek implants, or via harvesting and precise injection if fat transfer is chosen.
You’ll be monitored in recovery, receive swelling/bruising guidance, medications, and aftercare instructions before discharge (usually the same day).
Procedure Day: What to Expect During Cheek Augmentation
Cheek augmentation is usually performed as a day-case procedure in Turkey. Depending on the technique, the appointment may take 30–60 minutes for dermal fillers, 1–2 hours for fat transfer, or 1–2.5 hours for cheek implants (plus preparation and recovery time). Your clinic will guide you through each step to keep you comfortable and informed.
1) Check-in, consent & final planning
You’ll complete admission paperwork, review your medical history, and sign consent forms. The surgeon typically confirms the plan with facial assessment and may take pre-op photos and perform final markings to map the desired cheek contour.
2) Anesthesia or numbing (based on method)
- Fillers: topical numbing and/or local anesthetic; many fillers also contain lidocaine.
- Fat transfer: local anesthesia with sedation or general anesthesia (varies by clinic and extent).
- Cheek implants: commonly general anesthesia (sometimes deep sedation), especially if combined with other facial procedures.
3) The augmentation itself
- Dermal fillers: the practitioner injects filler in precise layers to build projection and smooth transitions; you may feel pressure but should not feel sharp pain.
- Fat transfer: fat is gently harvested (often from abdomen or thighs), purified, then injected in small amounts to shape the cheeks.
- Cheek implants: implants are positioned through small incisions (often inside the mouth) and secured; the surgeon checks symmetry and contour before closing.
4) Immediate checks & finishing touches
The team assesses symmetry, manages any bleeding or swelling, and applies dressings if needed. For fillers, you may see instant volume with mild swelling; for fat transfer and implants, swelling is more noticeable initially.
5) Recovery room & discharge instructions
After monitoring, you’ll receive tailored aftercare guidance typically including cold compress advice, medication instructions, and activity restrictions. If you had sedation or general anesthesia, you’ll need someone to accompany you and you should avoid driving that day.
Common sensations after the procedure
- Mild to moderate swelling and tenderness (more common with fat transfer/implants)
- Bruising (variable; often mild with fillers)
- Tightness or pressure in the cheeks (especially with implants)
Tip: Ask your clinic in advance whether your procedure is planned as fillers, fat transfer, or implants your timeline, anesthesia, and aftercare will differ accordingly.
Procedure Day: What to Expect During Cheek Augmentation
Cheek augmentation is usually performed as a day-case procedure in Turkey. Depending on the technique, the appointment may take 30–60 minutes for dermal fillers, 1–2 hours for fat transfer, or 1–2.5 hours for cheek implants (plus preparation and recovery time). Your clinic will guide you through each step to keep you comfortable and informed.
Procedure Day: What to Expect During Cheek Augmentation
08:30
Check-in &Final Assessment
09:30
Anesthesia &Marking
10:00-12:00
CheekAugmentation
13:30
Recovery &Discharge
You’ll arrive at the clinic, complete paperwork, review your goals, and confirm the plan with final photos and facial markings.
Your surgeon marks the cheek area and the anesthesia team prepares you—typically local anesthesia with sedation, or general anesthesia depending on technique.
The procedure is performed via small incisions (often inside the mouth) for cheek implants, or via harvesting and precise injection if fat transfer is chosen.
You’ll be monitored in recovery, receive swelling/bruising guidance, medications, and aftercare instructions before discharge (usually the same day).
1) Check-in, consent & final planning
You’ll complete admission paperwork, review your medical history, and sign consent forms. The surgeon typically confirms the plan with facial assessment and may take pre-op photos and perform final markings to map the desired cheek contour.
2) Anesthesia or numbing (based on method)
- Fillers: topical numbing and/or local anesthetic; many fillers also contain lidocaine.
- Fat transfer: local anesthesia with sedation or general anesthesia (varies by clinic and extent).
- Cheek implants: commonly general anesthesia (sometimes deep sedation), especially if combined with other facial procedures.
3) The augmentation itself
- Dermal fillers: the practitioner injects filler in precise layers to build projection and smooth transitions; you may feel pressure but should not feel sharp pain.
- Fat transfer: fat is gently harvested (often from abdomen or thighs), purified, then injected in small amounts to shape the cheeks.
- Cheek implants: implants are positioned through small incisions (often inside the mouth) and secured; the surgeon checks symmetry and contour before closing.
4) Immediate checks & finishing touches
The team assesses symmetry, manages any bleeding or swelling, and applies dressings if needed. For fillers, you may see instant volume with mild swelling; for fat transfer and implants, swelling is more noticeable initially.
5) Recovery room & discharge instructions
After monitoring, you’ll receive tailored aftercare guidance typically including cold compress advice, medication instructions, and activity restrictions. If you had sedation or general anesthesia, you’ll need someone to accompany you and you should avoid driving that day.
Common sensations after the procedure
- Mild to moderate swelling and tenderness (more common with fat transfer/implants)
- Bruising (variable; often mild with fillers)
- Tightness or pressure in the cheeks (especially with implants)
Tip: Ask your clinic in advance whether your procedure is planned as fillers, fat transfer, or implants your timeline, anesthesia, and aftercare will differ accordingly.
Immediate Aftercare and Recovery Timeline
Cheek augmentation recovery in Turkey depends on the technique used (dermal fillers vs. fat transfer vs. cheek implants). Your surgeon will provide personalised instructions and may prescribe pain relief and, for surgical options, antibiotics. Mild swelling, bruising, tightness, and tenderness are common in the first few days and should improve gradually.
Immediate aftercare (first 24–72 hours)
- Keep your head elevated (including during sleep) to help minimise swelling.
- Use cold compresses as advised (typically short intervals) to reduce swelling and discomfort.
- Avoid alcohol, smoking/vaping, and blood-thinning medications/supplements unless your doctor says otherwise.
- Do not massage, press, or sleep on your cheeks; avoid facials and saunas.
- Stick to gentle skincare; avoid makeup until your clinic confirms it’s safe (often 24 hours for fillers, longer for surgery).
- Choose soft foods and chew carefully if you feel soreness; stay well hydrated.
Typical recovery timeline
- Cheek fillers: Most people return to normal activities within 24–48 hours. Swelling/bruising may last 3–7 days. Final results usually settle over 1–2 weeks.
- Fat transfer: Swelling and bruising are more noticeable for 1–2 weeks. Early results are visible quickly, but the final outcome is assessed around 6–12 weeks as swelling resolves and fat retention stabilises.
- Cheek implants: Expect swelling and tightness for 1–2 weeks, with gradual improvement over several weeks. Many patients feel presentable after 10–14 days; full settling can take 6–12 weeks.
Activity and travel guidance
- Avoid strenuous exercise and heavy lifting for at least 48 hours after fillers, and typically 2–4 weeks after fat transfer or implants (follow your surgeon’s plan).
- Limit heat exposure (hot showers, steam rooms, sunbeds) during early healing, as it can worsen swelling.
- Attend all scheduled follow-ups before flying home, and keep your clinic’s contact details for remote check-ins.
When to contact your clinic urgently
- Increasing pain, rapidly worsening swelling, fever, or pus-like drainage.
- Skin colour changes (pale, dusky, or mottled areas), severe pain, or vision symptoms after fillers.
- Persistent bleeding, opening of the incision, or facial numbness that worsens after surgery.

Follow-Up Visits and Managing Swelling, Bruising, and Results
Follow-up visits are a key part of cheek augmentation in Turkey, whether you choose dermal fillers or cheek implants. Your surgeon (or injector) will use these appointments to confirm that healing is progressing normally, symmetry is developing as expected, and your final result matches the plan.
Typical follow-up schedule (may vary by clinic and technique):
- First check: within 24–72 hours (in-person or remote) to review early swelling, wound care (if implants), and pain control
- 1–2 weeks: assessment of bruising/swelling, incision healing (implants), and early contour
- 4–6 weeks: evaluation of shape and symmetry as swelling settles; discussion of any refinements
- 3 months: for implants, a longer-term contour check once tissues have stabilized; for fillers, a “settled” result review
Managing swelling and bruising
- Cold compresses: use as directed during the first 24–48 hours to reduce swelling (avoid direct ice on skin).
- Head elevation: sleep on your back with your head elevated for several nights to limit fluid buildup.
- Activity: avoid strenuous exercise, heavy lifting, and bending over for the period your clinic recommends (often 1–2 weeks for implants; a few days for fillers).
- Medications: take prescribed antibiotics/pain relief exactly as instructed. Avoid blood-thinning medicines or supplements unless your doctor approves.
- Heat and alcohol: limit alcohol, saunas/steam rooms, and very hot showers early on, as they can worsen swelling and bruising.
What results to expect (and when):
- Fillers: you may see an immediate change, but swelling can temporarily exaggerate volume. Final contour typically becomes clearer within 1–2 weeks.
- Cheek implants: early swelling is normal and can last several weeks. The cheek shape usually looks more “settled” by 4–6 weeks, with continued refinement over 2–3 months.
When to contact your clinic urgently (don’t wait for the next appointment):
- Rapidly increasing swelling, severe pain, or one-sided swelling that worsens after initially improving
- Fever, spreading redness, warmth, pus-like drainage, or a foul smell from an incision (implants)
- Vision changes, severe headache, skin blanching/blue discoloration, or intense pain after fillers
- Persistent numbness, new asymmetry that is getting worse, or any concern about implant movement
By attending scheduled check-ups and following your aftercare plan closely, most patients experience a smoother recovery, more predictable symmetry, and a more natural-looking final cheek contour.
Your Heal Road consultant can continue to support you after you return home, helping you arrange remote follow-ups and answer recovery questions.
Heading Home: Long-Term Care and Maintaining Your Cheek Contour
Most patients can travel home shortly after cheek augmentation in Turkey, depending on the technique used (dermal filler, fat transfer, or cheek implants) and your surgeon’s advice. Before you leave, make sure you understand your aftercare plan, warning signs to watch for, and how your clinic will support you remotely. Long-term results depend on protecting the area while it heals and maintaining healthy skin and soft tissue habits.
Before You Fly Home
- Confirm your follow-up plan: know when your final in-person check is, and how to share photos or arrange video reviews once you’re home.
- Get written instructions: medications, wound care (if incisions are present), activity limits, and when you can resume skincare and makeup.
- Plan for travel comfort: keep your head elevated when resting, stay hydrated, and avoid pressure on the cheeks (tight masks, leaning on your face).
Early Recovery at Home (First 1–2 Weeks)
- Swelling and bruising: mild to moderate swelling is common and can fluctuate. Use cold compresses only if your surgeon approves, and avoid heat exposure (saunas/steam rooms).
- Sleep position: sleep on your back with your head elevated to reduce swelling and avoid shifting pressure on the cheeks.
- Activity: avoid strenuous exercise, heavy lifting, and bending forward until cleared these can worsen swelling.
- Skin and hygiene: keep the area clean and follow guidance on when to restart cleansing, active skincare (retinoids/acids), and makeup.
Settling In (Weeks 3–8)
- Filler: results are usually visible quickly, but final contour may take a couple of weeks as swelling settles. Avoid facial massage unless specifically advised.
- Fat transfer: the cheeks can look fuller early on; some volume reduction is expected as the body stabilises the grafted fat.
- Cheek implants: swelling may take longer to resolve. Continue to avoid pressure and follow any dietary or oral-care instructions if the approach was intraoral.
Long-Term Maintenance and Protecting Your Results
- Sun protection: daily SPF helps protect skin quality and reduces the risk of pigmentation changes after bruising.
- Stable lifestyle: major weight fluctuations can affect facial volume especially after fat transfer.
- Plan touch-ups if needed: fillers may require maintenance over time; your provider can advise an appropriate schedule based on product type and your goals.
- Regular check-ins: attend your clinic’s remote follow-ups and see a local clinician if you have concerns.
When to Seek Urgent Medical Advice
Contact your clinic immediately and seek urgent care if you develop severe or rapidly increasing pain, spreading redness or warmth, fever, pus-like discharge, sudden changes in vision, marked asymmetry that worsens quickly, or skin colour changes (blanching/blue-grey areas) after filler.
Your Heal Road consultant can continue to support you after you return home, helping you arrange remote follow-ups and answer recovery questions.

Essential Tips for a Safe, Natural-Looking Cheek Augmentation Experience in Turkey
- Choose the right technique for your goal (and anatomy): Cheek enhancement can be done with dermal fillers, fat transfer, or cheek implants. Fillers are typically best for subtle contouring and quick recovery, fat transfer can provide a softer, longer-lasting result (with some resorption), and implants may suit patients seeking a more structural, permanent change. A reputable surgeon will recommend the option that fits your facial proportions not a one-size-fits-all approach.
- Verify credentials and experience with facial aesthetics: Prioritize board-certified plastic surgeons or ENT/maxillofacial surgeons with a strong focus on facial procedures. Ask how many cheek augmentations they perform per month/year and request before-and-after photos of patients with similar facial structure and desired outcomes.
- Review before-and-after photos critically: Look for consistent lighting, multiple angles (front, 45°, profile), and results that appear balanced rather than over-projected. Natural-looking outcomes usually preserve under-eye harmony, avoid an overly “high” or “wide” cheek, and maintain facial symmetry.
- Confirm product/implant details in writing: For fillers, ask for the brand, type (e.g., HA vs. other), batch/lot number, and whether the injector will use cannula or needle. For implants, confirm the material (commonly silicone/Medpor), size options, and placement approach. Avoid clinics that won’t disclose product information.
- Have a thorough consultation and share your full medical history: Disclose prior fillers, facial surgeries, dental issues, autoimmune conditions, bleeding disorders, allergies, and all medications/supplements (including aspirin/NSAIDs, vitamin E, fish oil, and herbal products). This helps reduce bruising/bleeding risk and prevents complications from treating previously filled areas.
- Prioritize a conservative, staged plan for natural results: Especially with fillers, “less is more.” It’s often safer to start with a smaller volume and reassess after swelling settles. Overfilling can look unnatural and may increase the risk of vascular complications.
- Ask about safety protocols and emergency preparedness: For filler treatments, the clinic should have a clear protocol for vascular occlusion (including immediate access to hyaluronidase for HA fillers) and staff trained to recognize warning signs. For surgical options, confirm anesthesia type, monitoring standards, and who provides anesthesia care.
- Plan your travel timeline around swelling and follow-ups: Schedule enough time in Turkey for post-procedure checks. Swelling and bruising are common, and results may look uneven early on. Avoid booking critical events immediately after treatment, and keep your return flight flexible if possible.
- Follow pre- and post-treatment instructions precisely: Your clinic may advise pausing certain blood-thinning medications/supplements (only with your doctor’s approval), avoiding alcohol before/after, and limiting intense exercise for a short period. After treatment, follow guidance on sleeping position, cold compress use, massage (only if instructed), and skin care to support healing and reduce complications.
- Know the red flags and seek help immediately: Contact your clinic urgently if you experience severe or worsening pain, blanching/gray discoloration of the skin, vision changes, increasing asymmetry after initial swelling, fever, pus, or rapidly spreading redness. Early intervention is critical for the best outcomes.
- Set realistic expectations about longevity and maintenance: Filler results are temporary and may require maintenance; fat transfer can partially resorb; implants are long-lasting but involve surgery and potential revision. A trustworthy provider will explain what “final results” mean for your chosen method and the typical timeline for settling.
Conclusion
Article Contributors

Heal Road Editor
Editor

Heal Road Writer
Writer
- Views
- 165 views
- Reading Time
- Last Updated